
Humidity remains the primary factor for failure in outdoor electrical installations, even when the displayed protection index (IP) seems sufficient. In France, the NF C 15-100 standard imposes strict requirements for each connection in exposed areas, but omits certain practical details that cause the majority of incidents.
A poorly protected junction, even with certified equipment, exposes the entire circuit to risks of oxidation or short-circuiting. Forgetting a simple cable tie or using an unsuitable connector is enough to compromise the safety of the installation for several years.
See also : Strategies to Monetize an Online Magazine Despite Users' Reluctance to Pay for Information
Why electrical safety outdoors cannot be improvised
Installing or modifying an electrical circuit outdoors allows for no improvisation. Water, humidity, as well as temperature fluctuations, accelerate corrosion and multiply the risks of short-circuiting. The role of a watertight junction box is clear: it gathers and protects electrical connections, thus limiting accidents and offering easier maintenance. Whether in a garden, garage, basement, or under a manhole, even the slightest flaw in waterproofing can weaken the entire installation.
The robustness of your setup primarily depends on the choice of a box compliant with the NF C 15-100 standard. This regulation requires that each connection be housed in an easily accessible junction box, allowing for future intervention or network control. More than just a simple box, it becomes a barrier against infiltration. For effective protection, aim for a protection index of IP65 or higher: this threshold guarantees real resistance to water splashes and dust, the minimum conditions to preserve the integrity of the outdoor electrical installation.
Read also : How to Dress for Gardening Tasks?
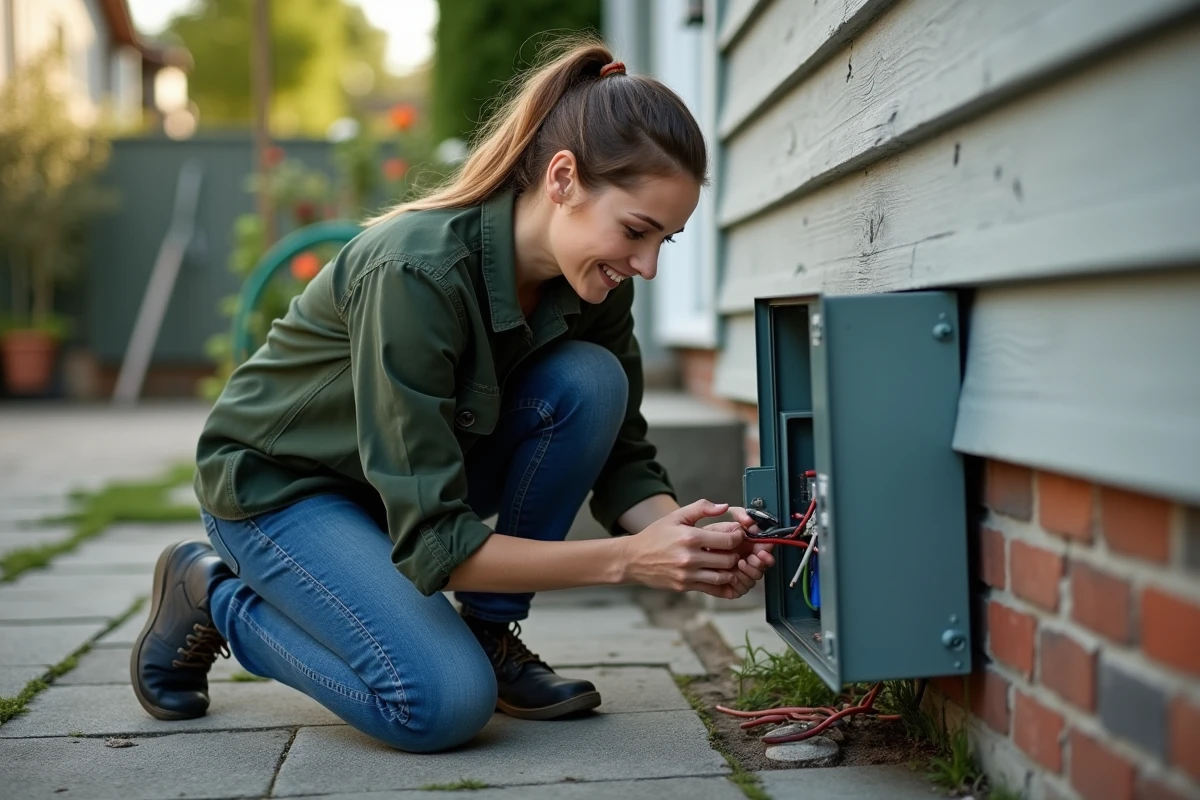
Before touching any cables, cut the power at the differential circuit breaker. This reflex protects the worker and eliminates any risk of accident. If there is any doubt, consult a licensed electrician or rigorously follow each step of the protocol. Always keep in mind: a junction box must remain accessible to ensure maintenance and verification of connections over time.
For those who wish to delve deeper into the subject and aim for a flawless installation, reading the advice from Votre Déco helps avoid the most common mistakes and apply the methods recommended by professionals. Choice of materials, care taken with connections, strict adherence to standards: this is the triptych of a reliable and durable electrical network.
What criteria to consider when choosing a watertight junction box suitable for your needs
Choosing a watertight junction box is not just about looking at its size or appearance. Several criteria come into play. First point: the environment. Outdoors or in a damp room, protection against water and dust is essential. Each box displays its protection index (IP): choose a model with IP65 or higher, synonymous with waterproofing against splashes and jets of water.
Here is an overview of the different types of boxes suited for various uses:
| Type of box | Use |
|---|---|
| Surface-mounted | On wall or ceiling, easy access |
| Flush-mounted | In partition, ceiling, or masonry |
| Special for drywall | Suitable for lightweight constructions |
The capacity of the box must correspond to the number of cables, the volume of connections, and the space needed to work without hindrance. To avoid overheating or future faults, never overload the box to its maximum. Cables must pass through suitable cable glands or designated entries to maintain the waterproofing of the setup.
To enhance safety, using an insulating gel or a specific resin effectively protects connections against humidity. A box compliant with the NF C 15-100 standard ensures easy access to each connection. Finally, ensure compatibility with the conduits (ICTA, IRL) used on the site. The quality of the electrical materials plays a direct role in the reliability and longevity of the installation.
Detailed steps to install an outdoor socket with confidence
Before starting any connection, cut the main power at the electrical panel. Check for the absence of voltage with a multimeter: it’s better to check twice than once. Then prepare all the equipment: watertight junction box, suitable connectors (Wago type or automatic terminals), watertight electrical socket, ICTA conduits, screwdriver, wire stripper, hole saw.
Identify the location where the socket will be installed. Open the junction box, drill the entries for the conduits, then securely fix it to a stable support (wall, partition, manhole). Pass the cables through the conduit while respecting the color code: blue for neutral, green/yellow for ground, red, brown, or black for phase. Carefully strip the conductors.
Connect the wires in the junction box using certified connectors. No twisted or piled wires: each conductor must be well secured. Then attach the watertight socket in the chosen location, connect the wires in accordance with the NF C 15-100 standard, and then seal the box and socket tightly. Good waterproofing protects the installation against humidity and water splashes over the long term.
Before restoring power, a visual and mechanical inspection is necessary: no exposed wires, all connections tight. You can then restore power and test the socket with an appropriate device. In case of doubt, the intervention of a licensed electrician remains the best guarantee of compliance.
A successful outdoor electrical installation promises a garden where safety is never compromised. With each protected socket, peace of mind settles in, lasting and uncompromising.